Just as every student learning a programming language starts with “Hello World,” for those of us learning microcontroller development, the first lesson is to light up the LED on the microcontroller.
Today, I will record my first experience with the 51 microcontroller.
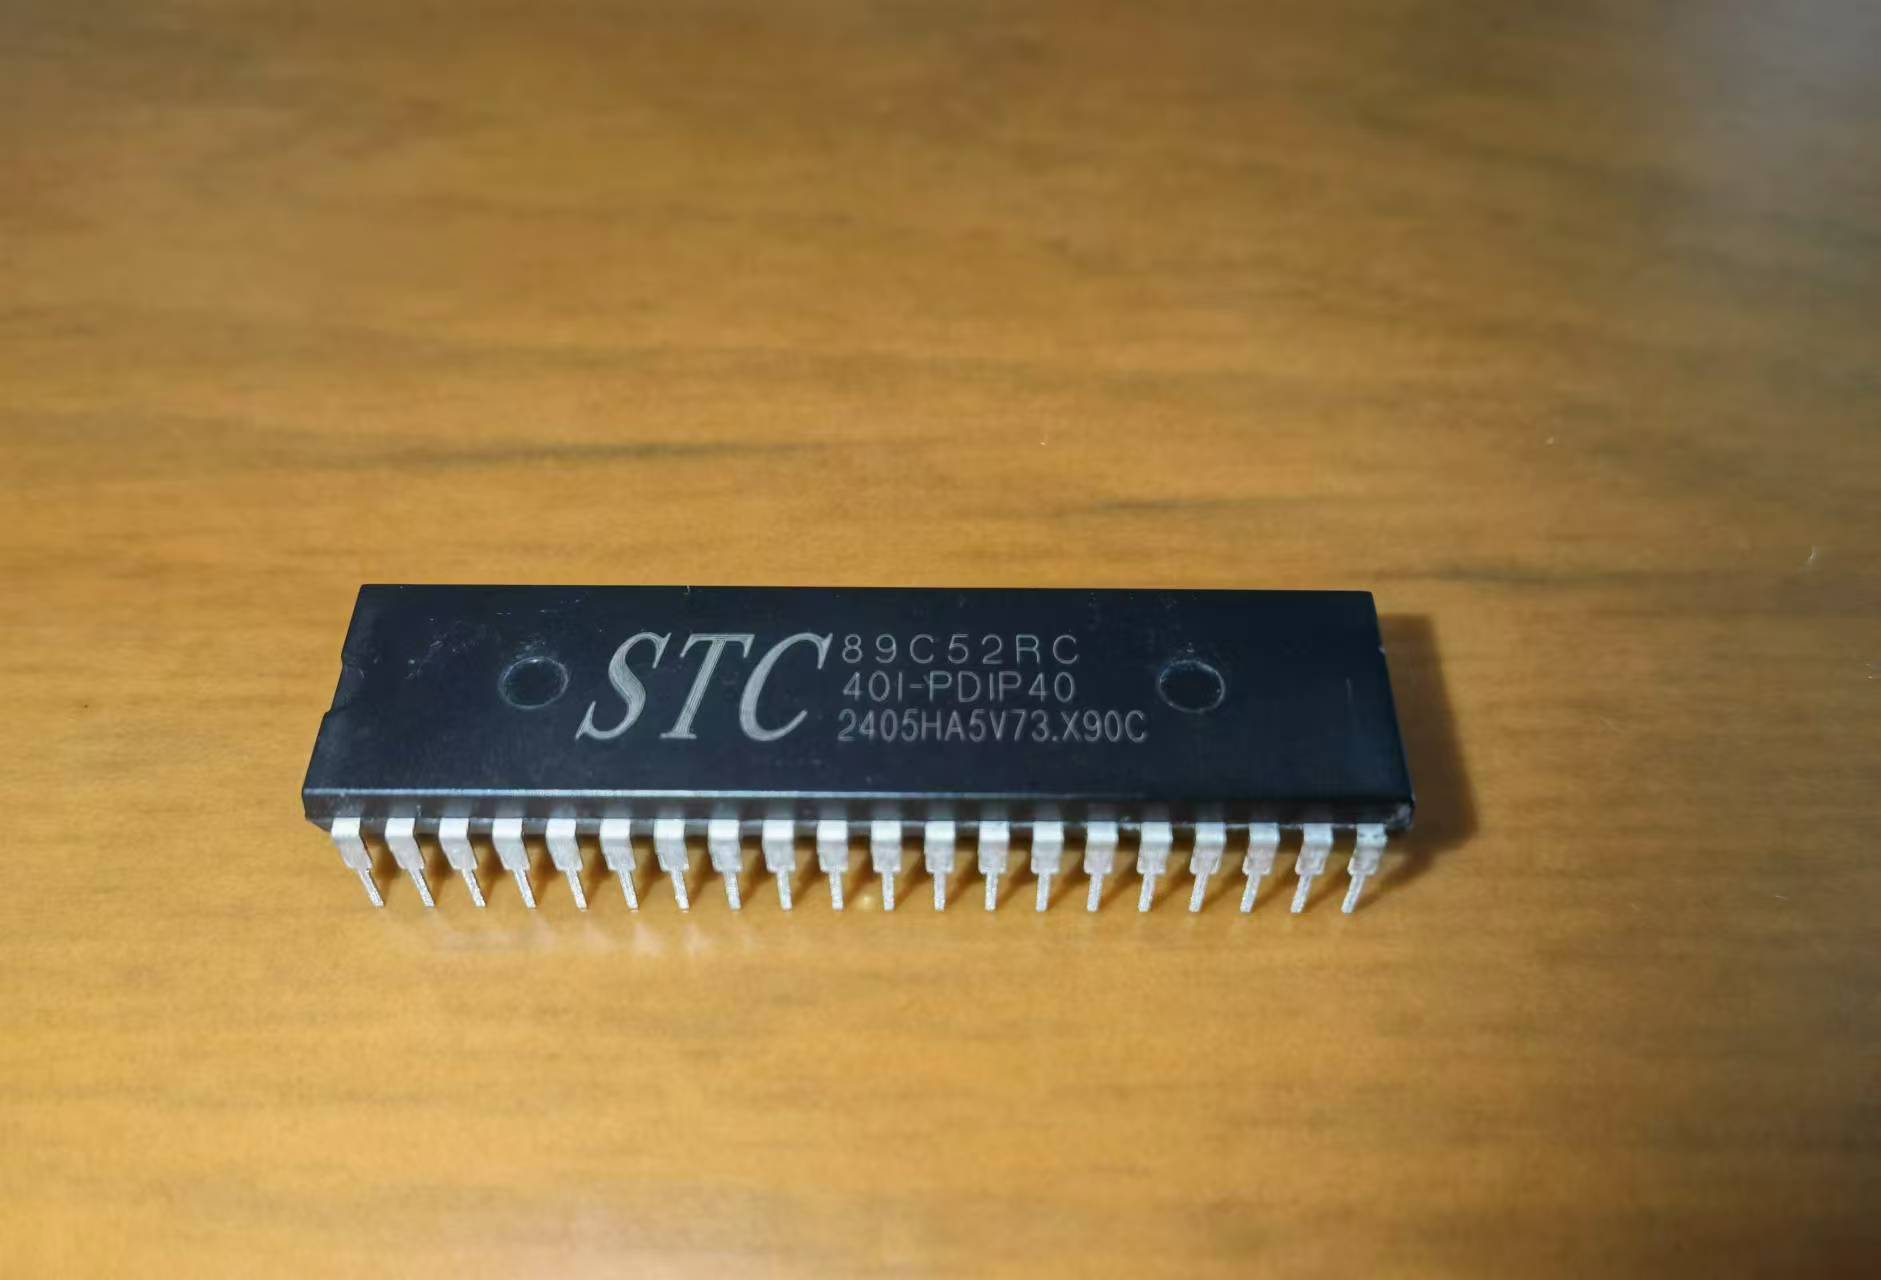
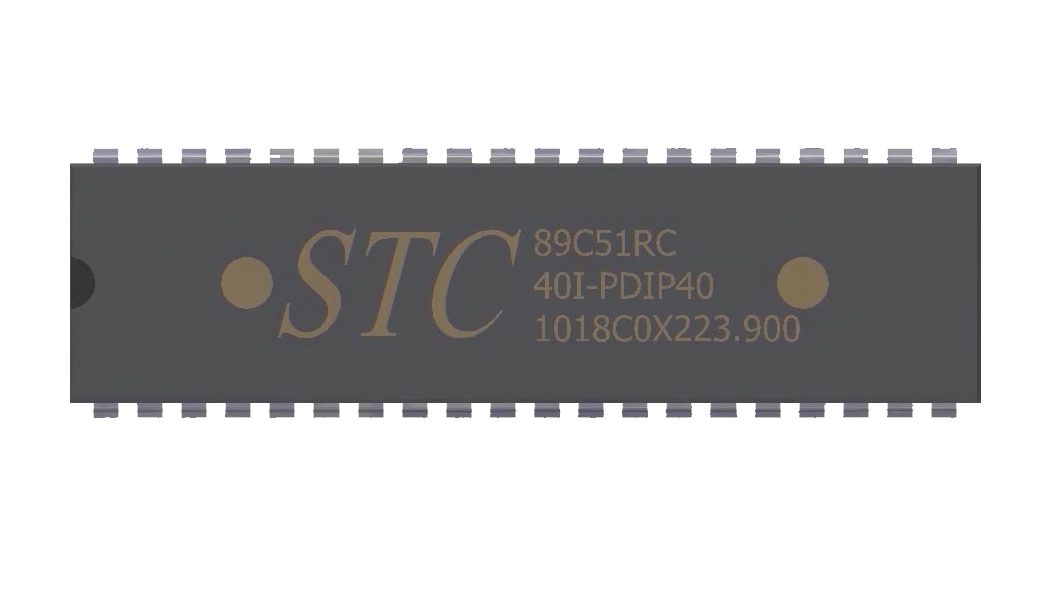
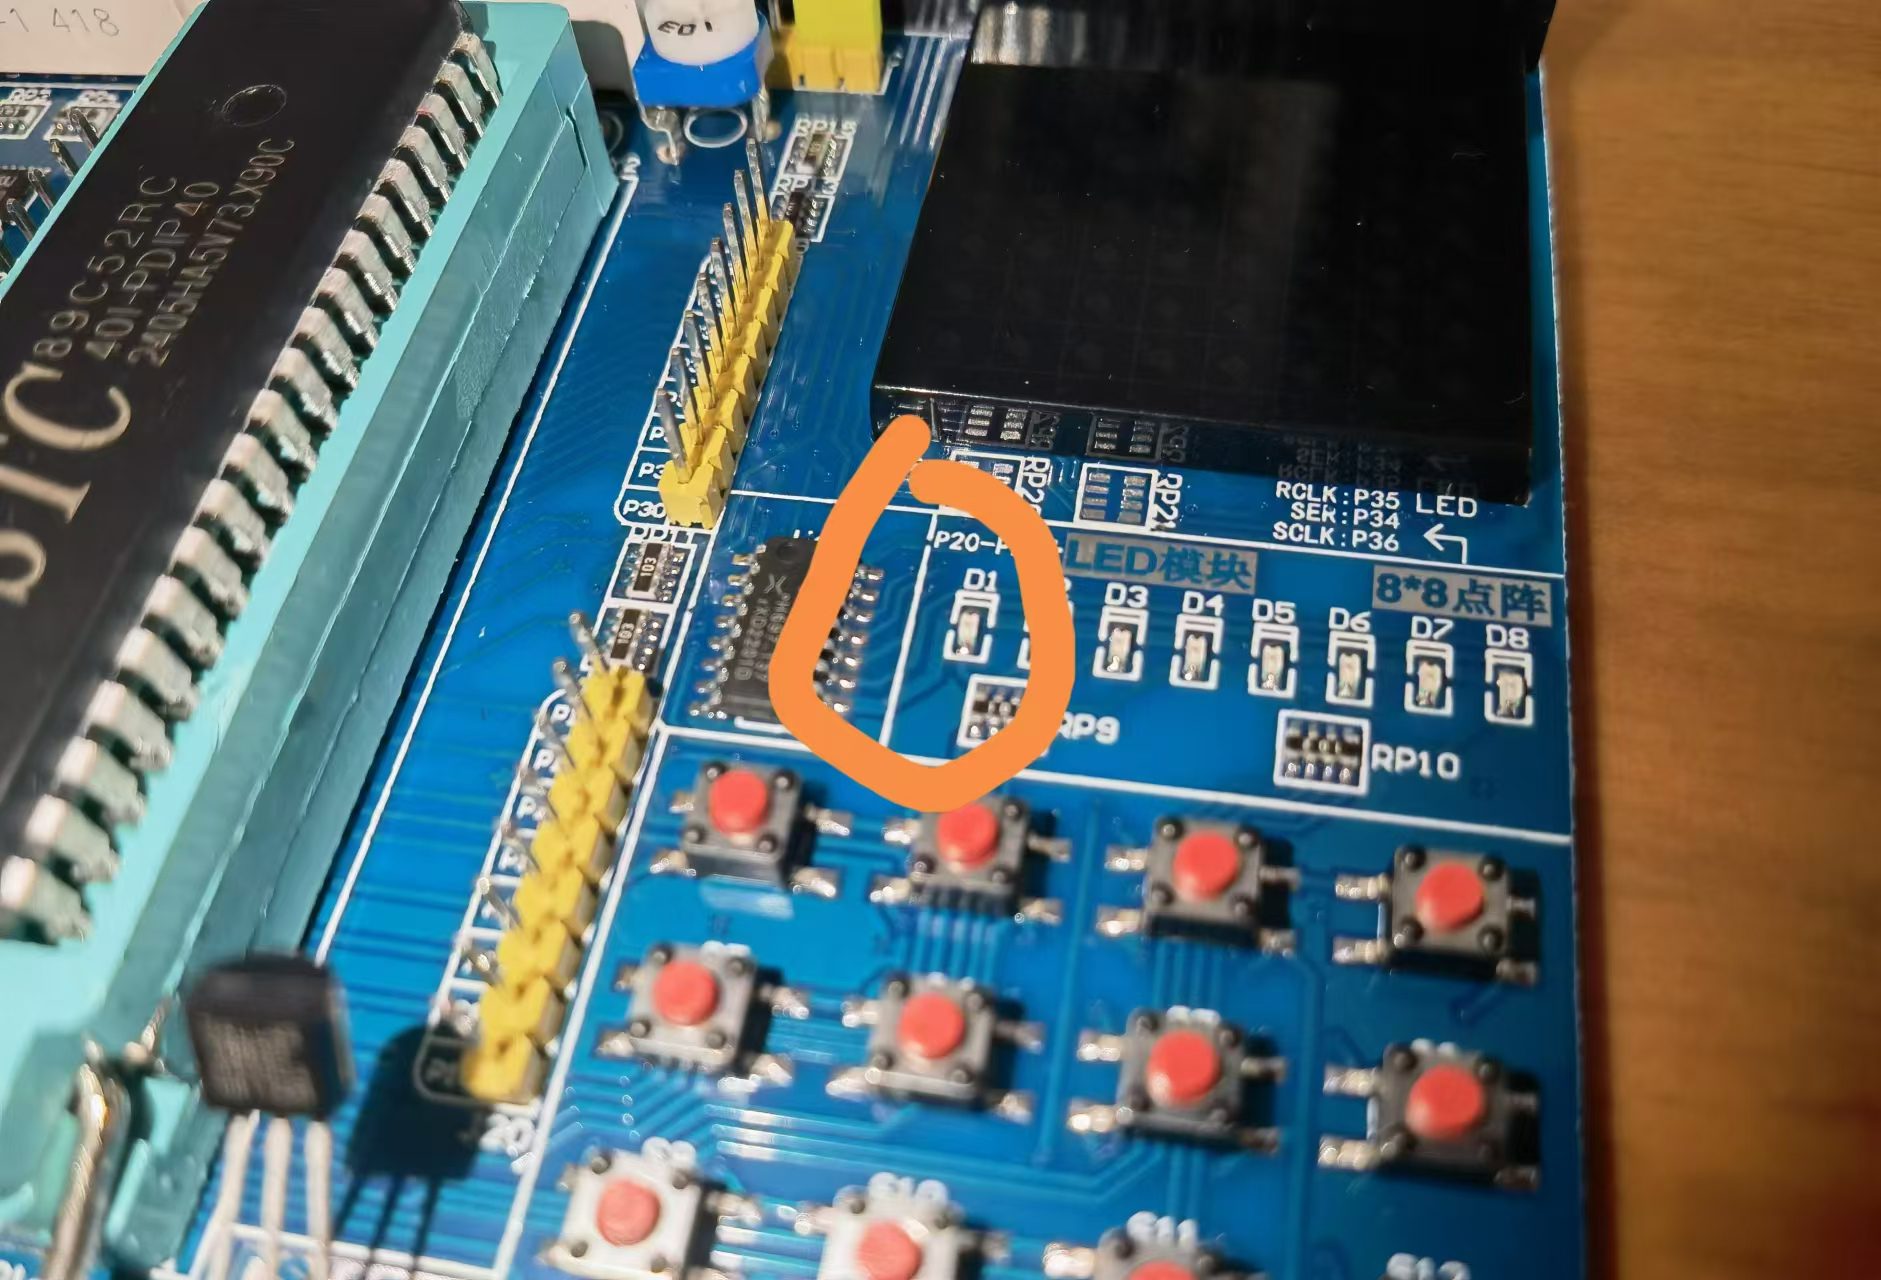
As shown in the picture, the 51 chip I am using is produced by STC, a Chinese company. If your chip is different, it doesn’t matter, as long as it follows the 8051 standard.
Software Preparation
To develop a microcontroller, you mainly need two pieces of software: Keil and a microcontroller download program.
Note that Keil currently only offers a Windows version and does not support MacOS or Linux yet.

How to Download Keil
This is very simple, just go to the official website to download it.
Here is the official website address: https://www.keil.com/download/product/
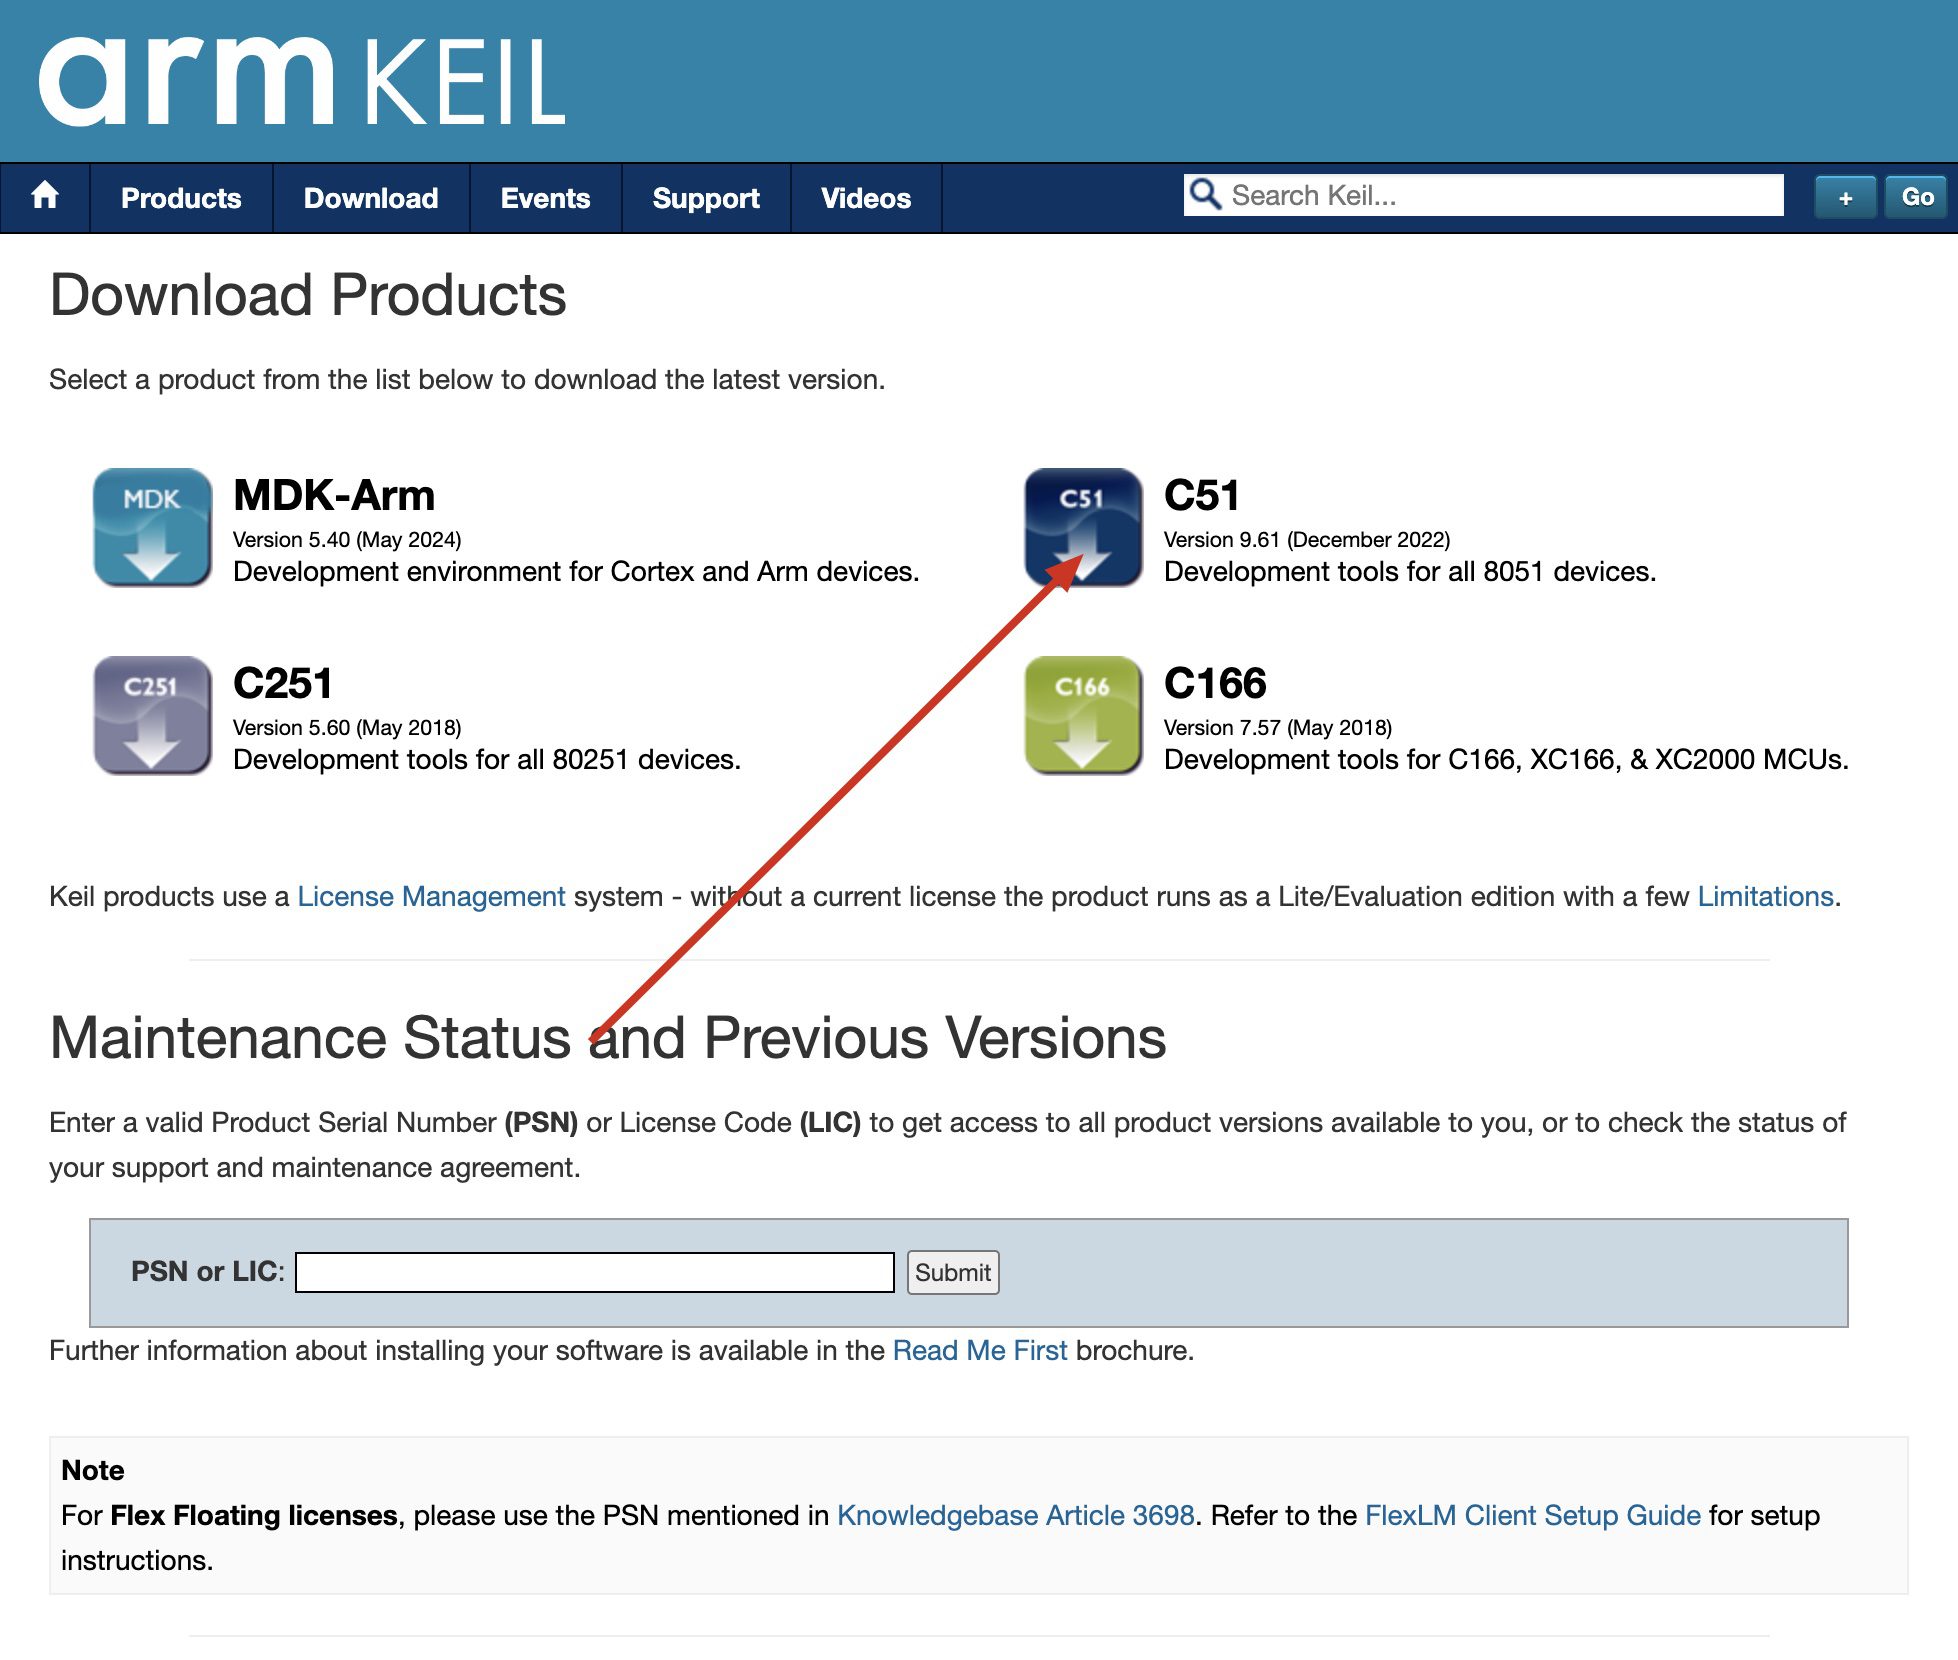
Click on C51 and download it.
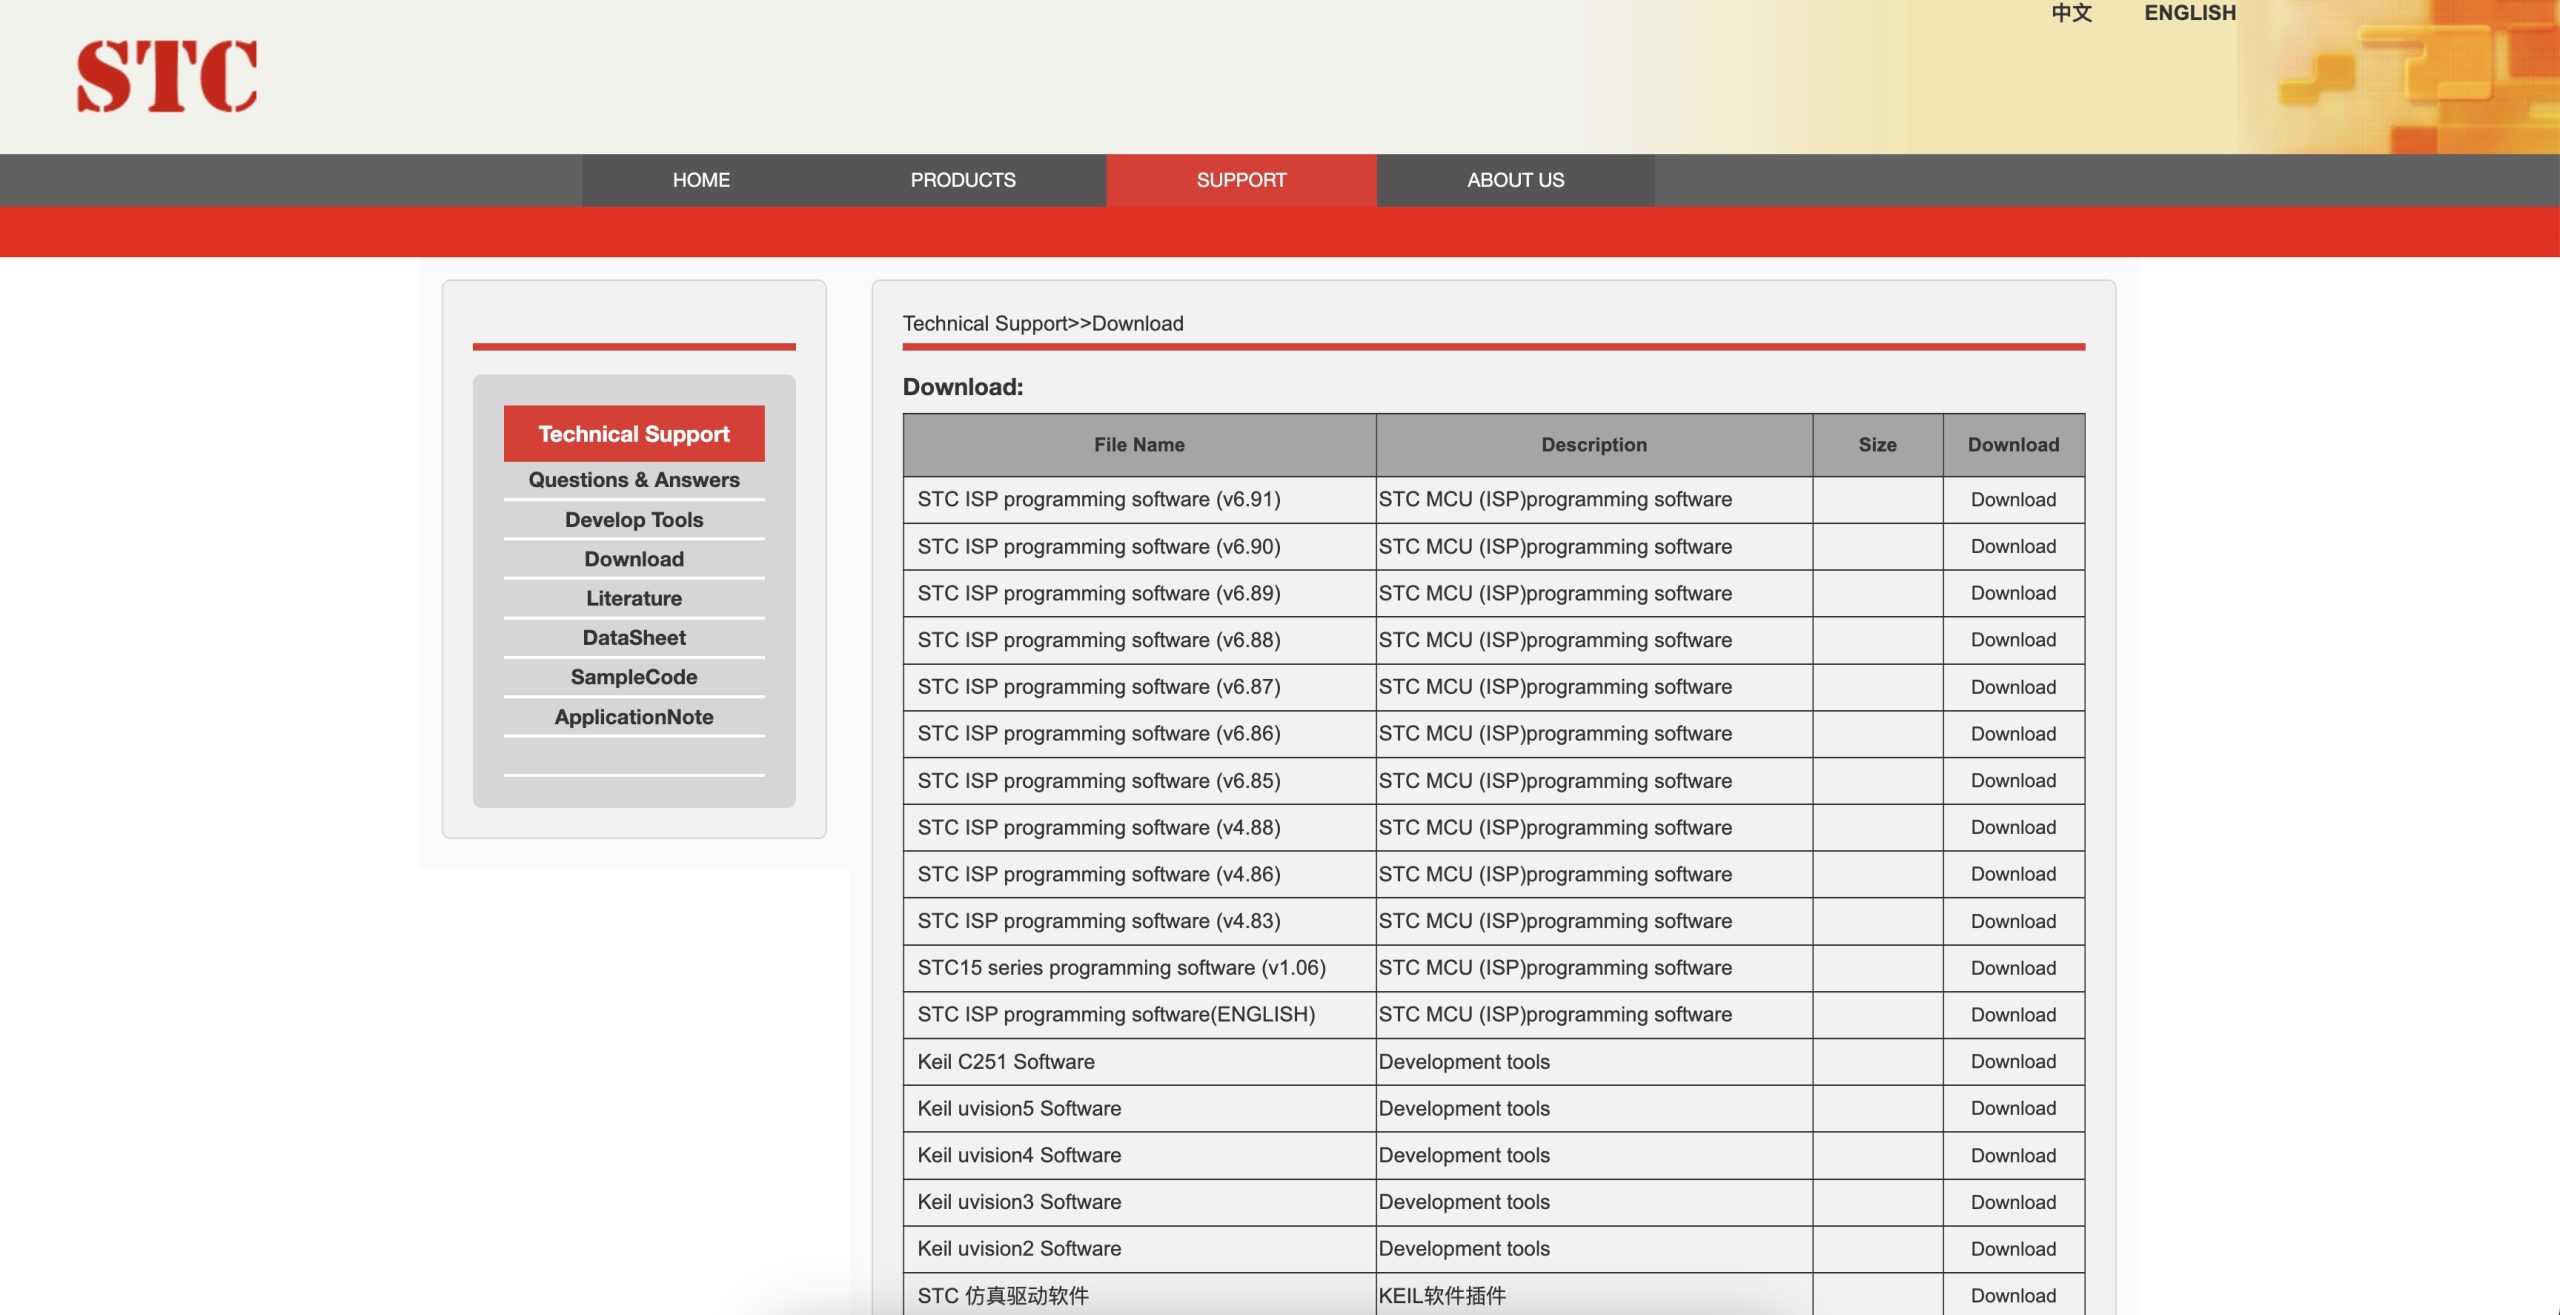
Download Microcontroller Burning Software
This may vary from person to person. I am using the 51 microcontroller produced by STC, so I use the official microcontroller burning software from STC. Choose the burning software corresponding to your chip.
Here is the official STC website: https://www.stcmicro.com/rjxz.html
At this point, our preliminary preparations are complete.
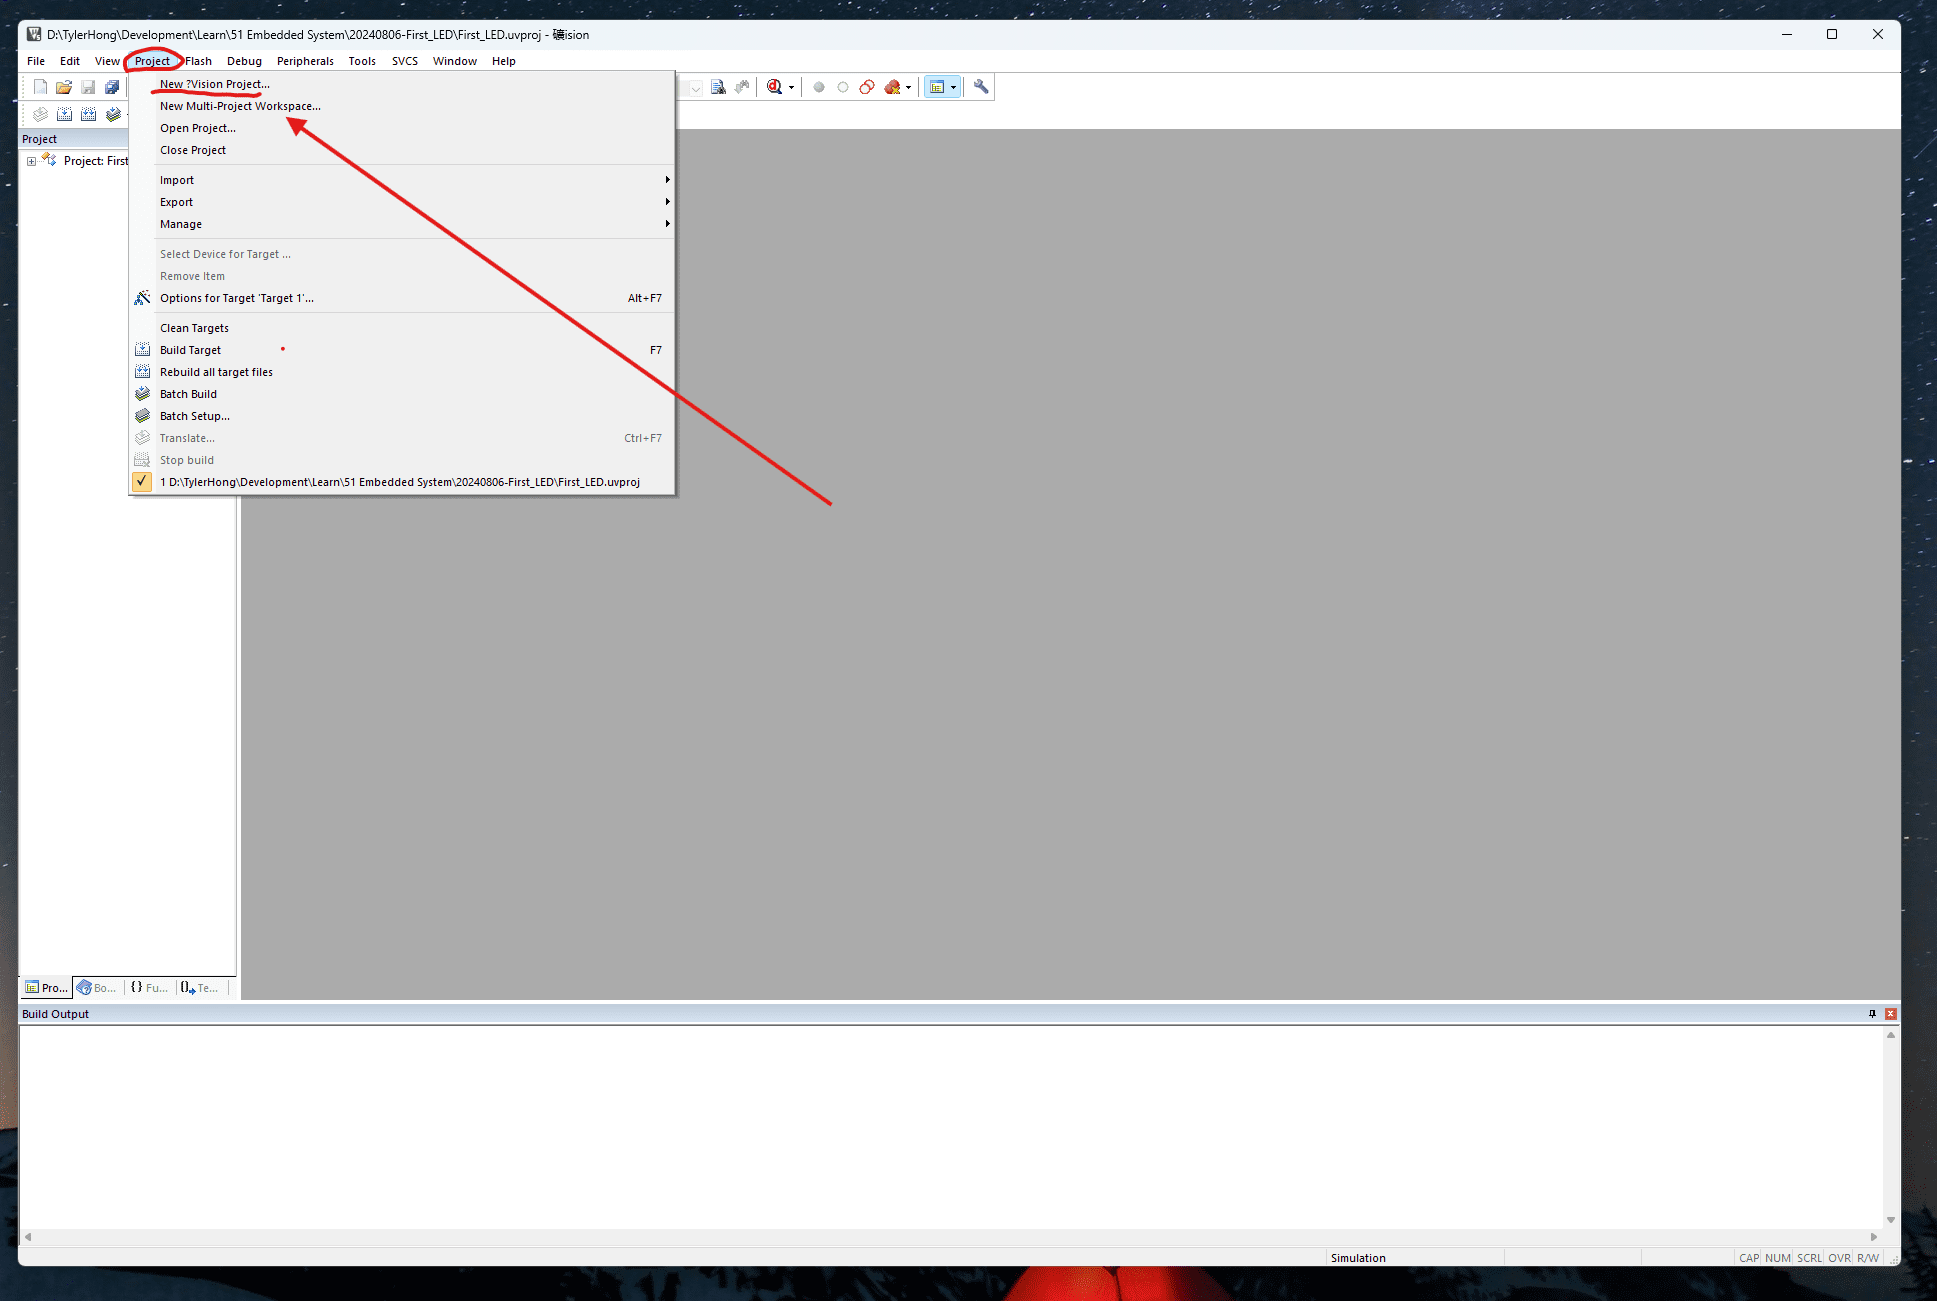
Create a Project File
First, open the Keil5 software, then click on Project in the upper left corner and select New Project.
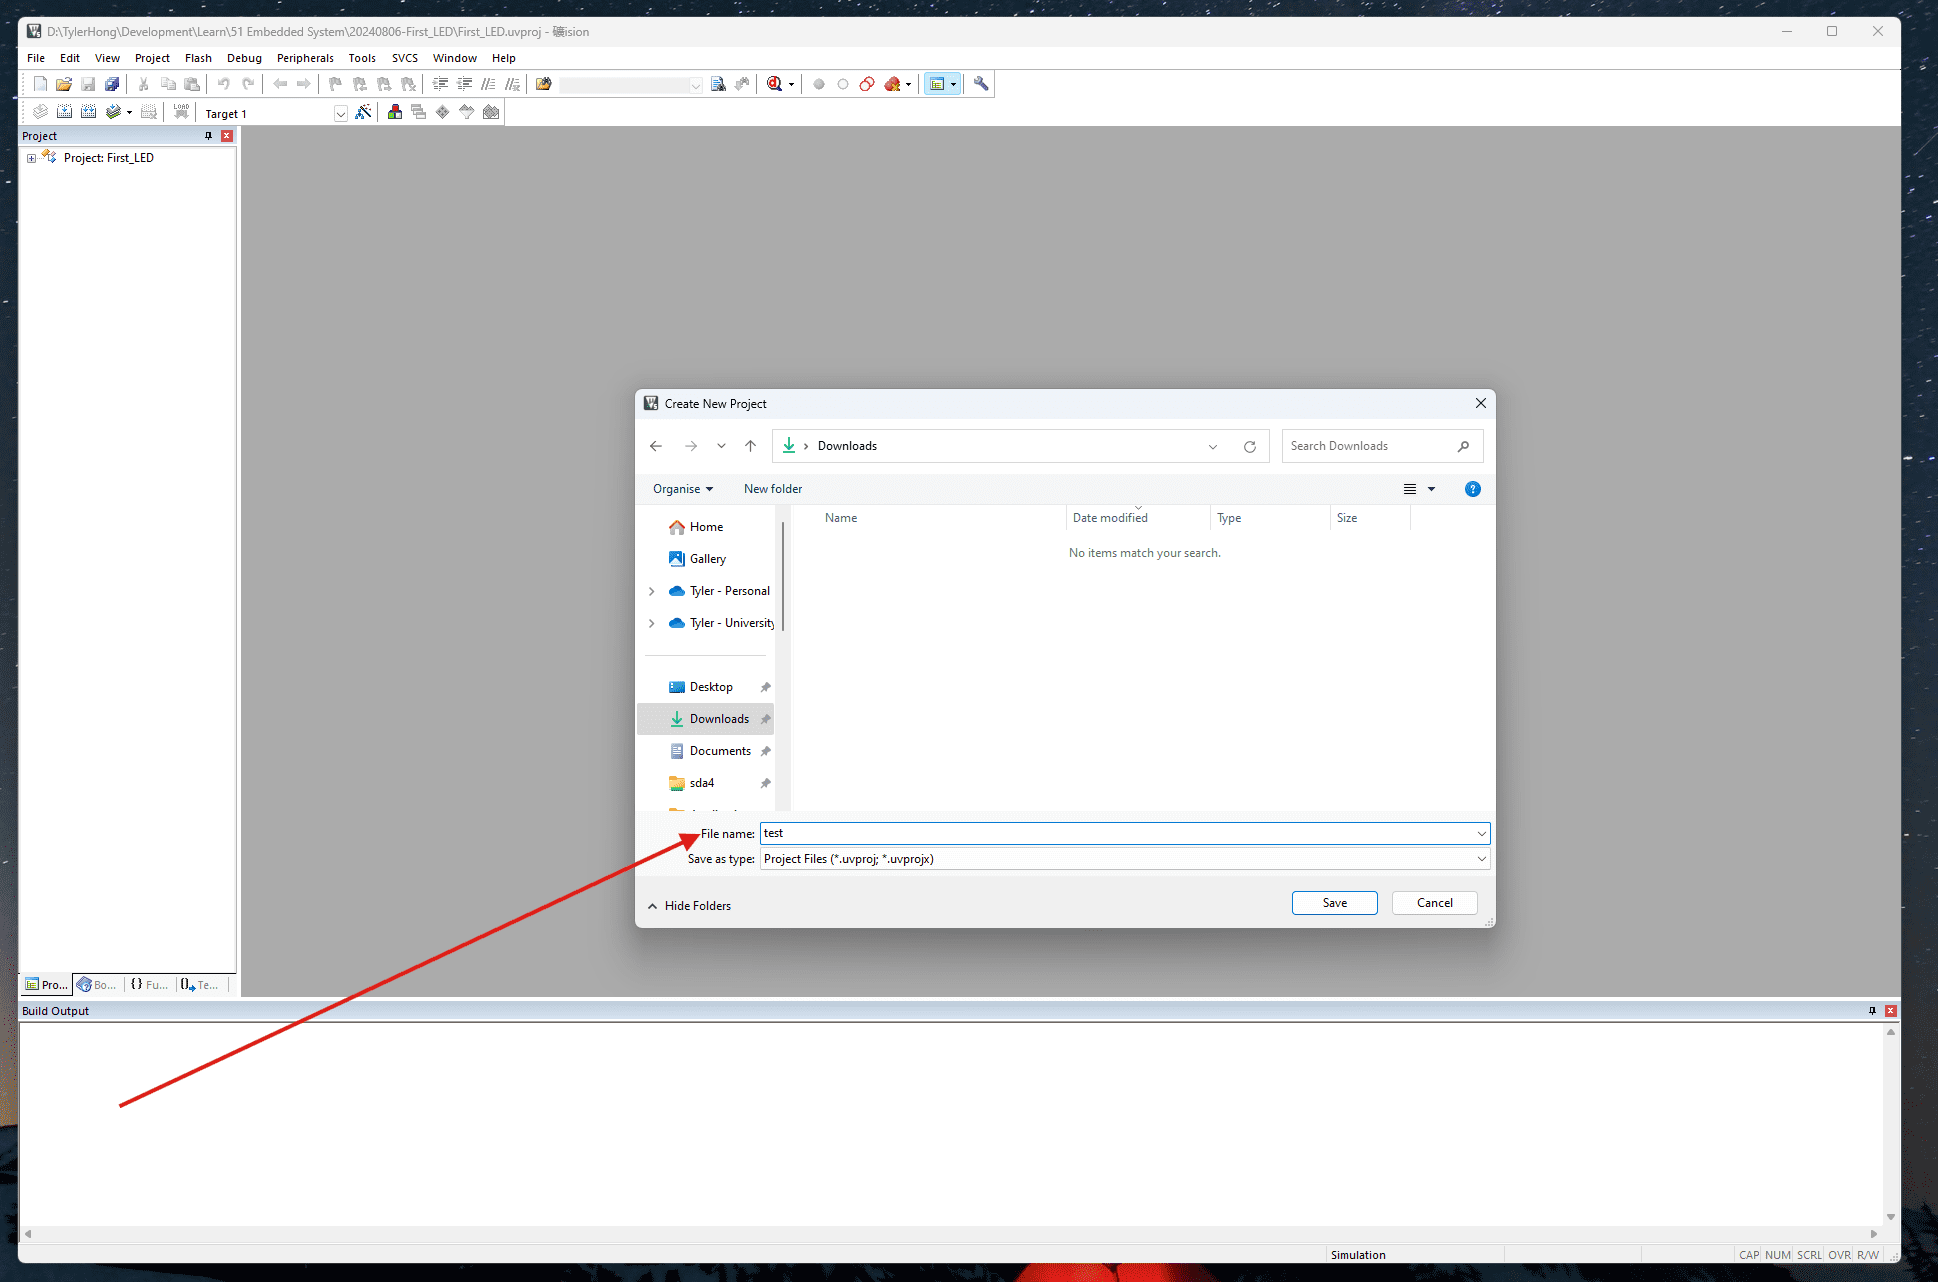
Second, choose your save location in the pop-up window, remember to give your project a name, then Save.
Next is a crucial step. At the beginning of the article, I mentioned the 51 microcontroller model I am using: STC89C52RC. However, we cannot find STC microcontrollers in the software. What should we do?
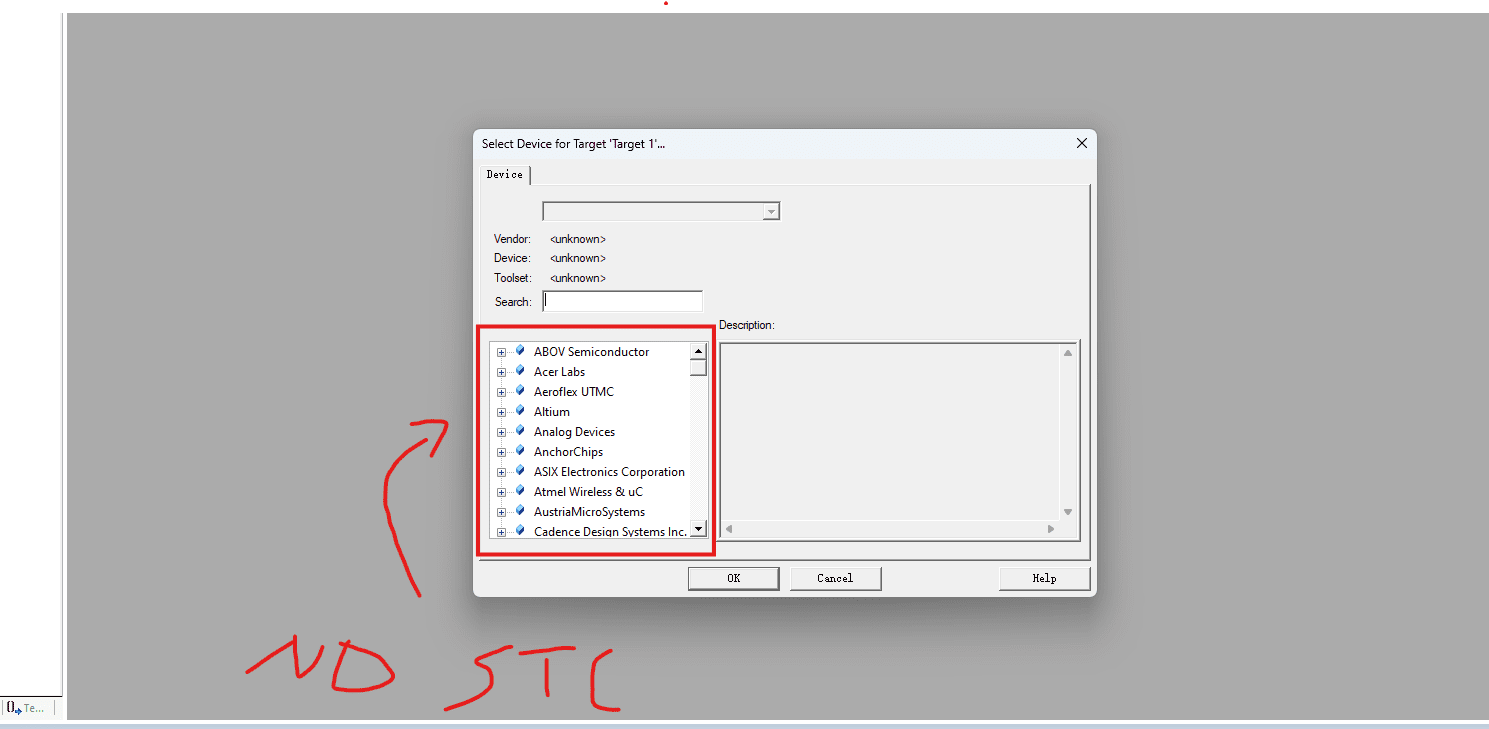
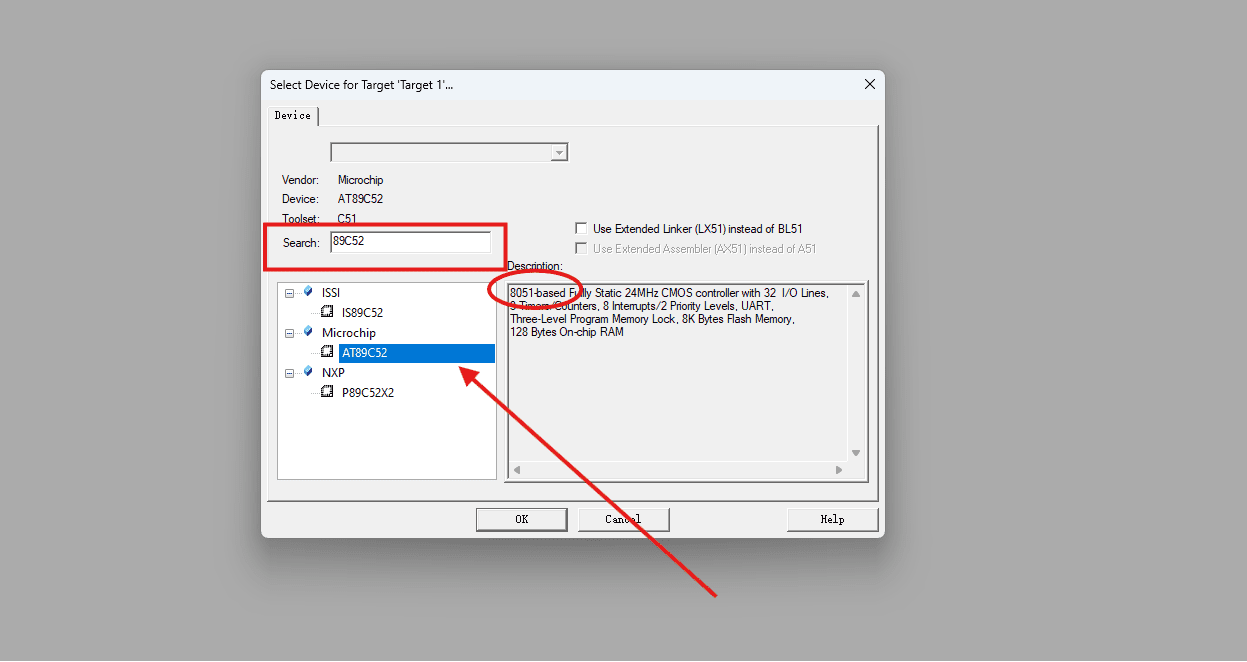
It’s okay because my microcontroller strictly follows the 8051 standard. I just need to select a model that also follows the 8051 standard in the software. Search for my chip model 89C52 in the search box. I choose the Microchip company’s chip, which is also based on 8051. After choosing, select OK.
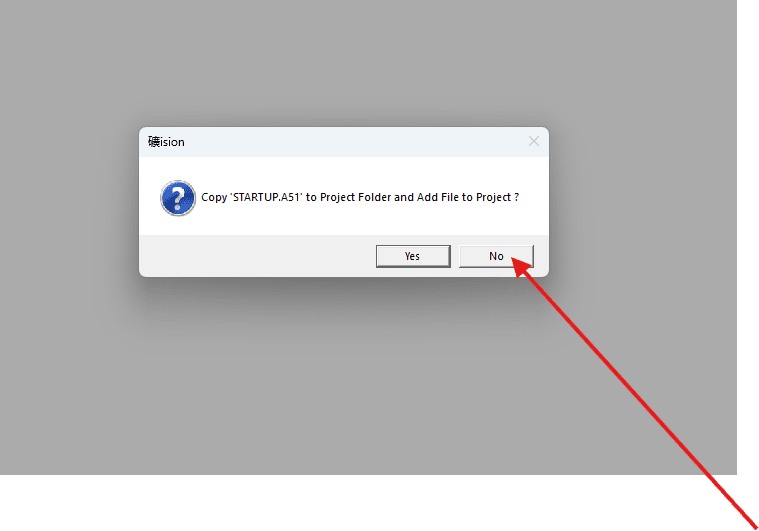
In the next pop-up, select NO, as we do not need to copy the startup file.
Our project file is now created.
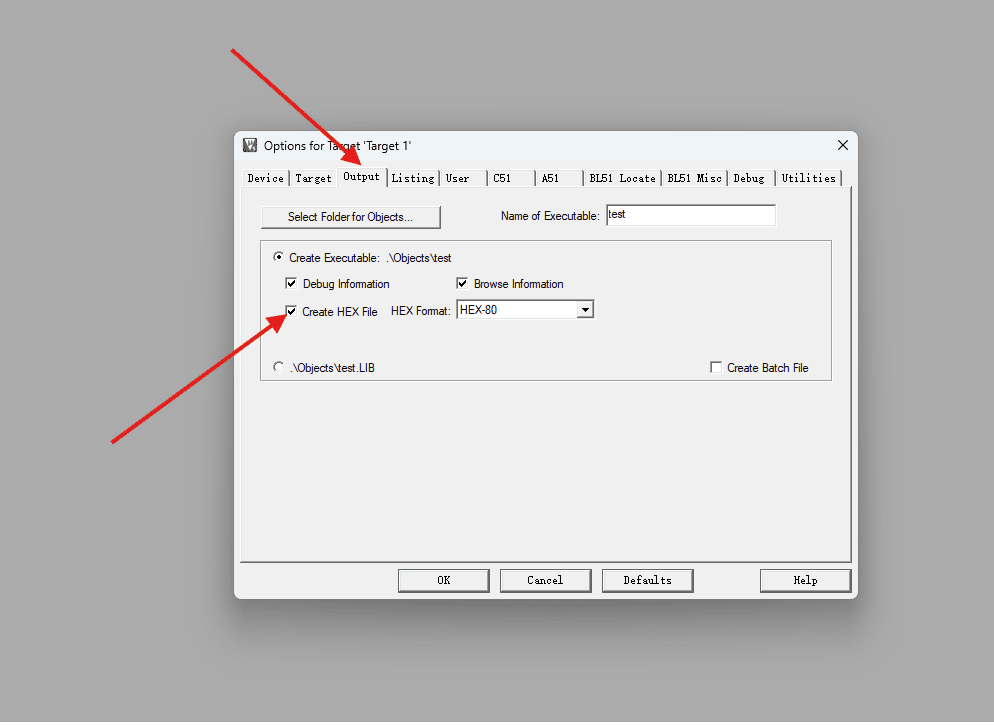
Enable HEX File Generation
After writing the code, we need to generate a HEX file and burn it into the microcontroller. Keil5 does not generate HEX files by default, so we need to enable this setting.
Click on the magic wand tool in the upper left corner.
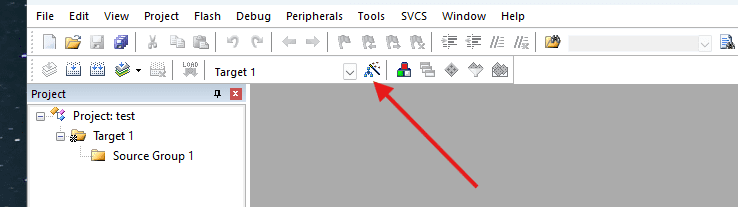
In the pop-up menu, select Output and check Create HEX File.
Writing Code
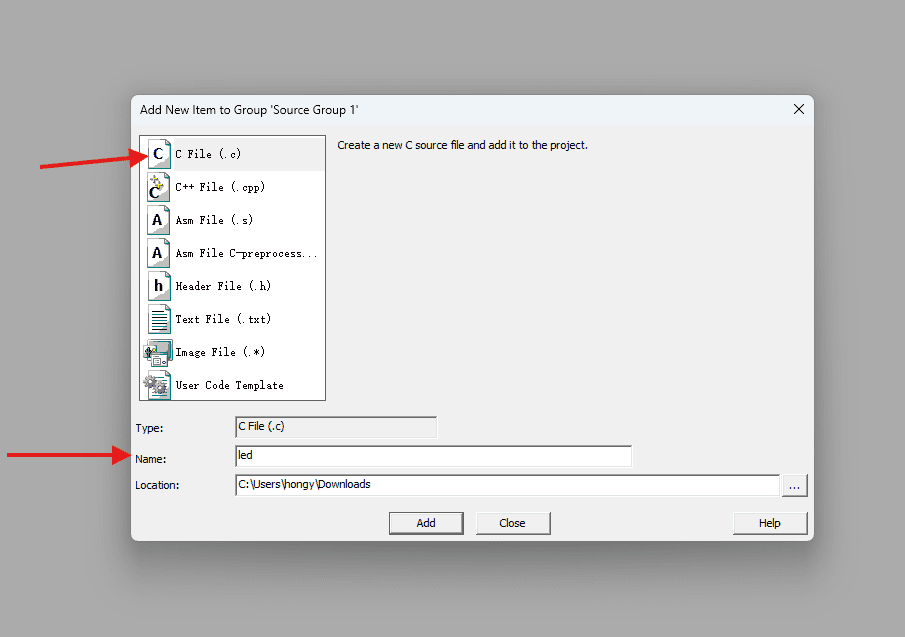
Right-click on Source Group and select Add Files.
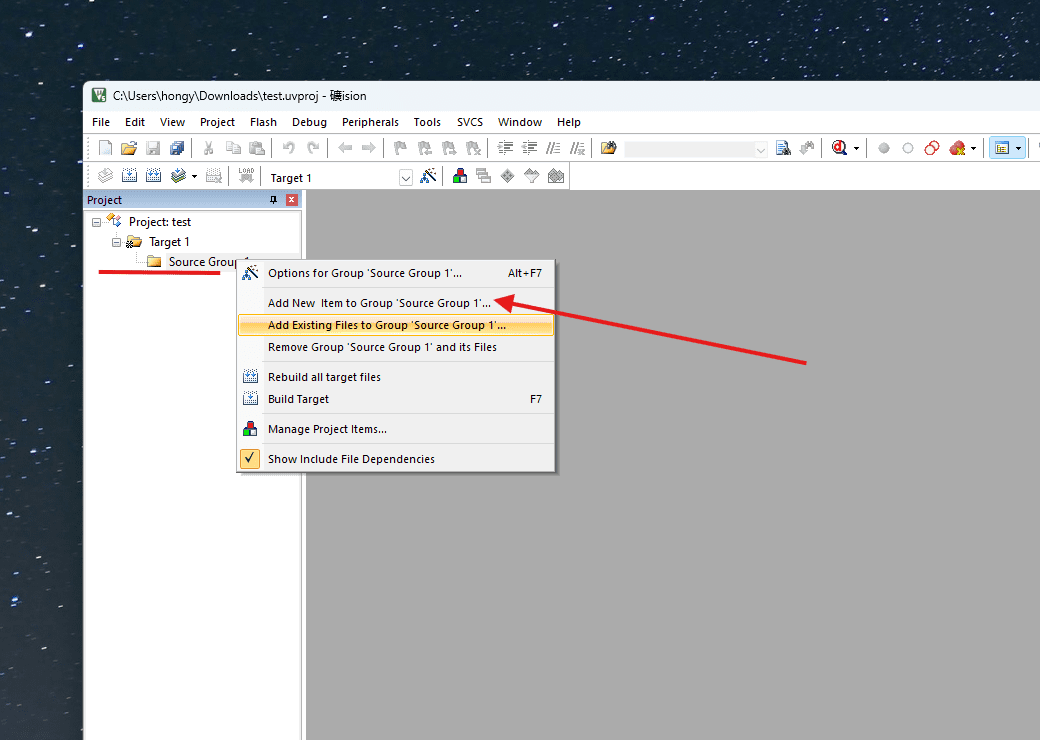
In the pop-up menu, select .c file, give the file a name, and click Add.
A new file is now added to the project group.
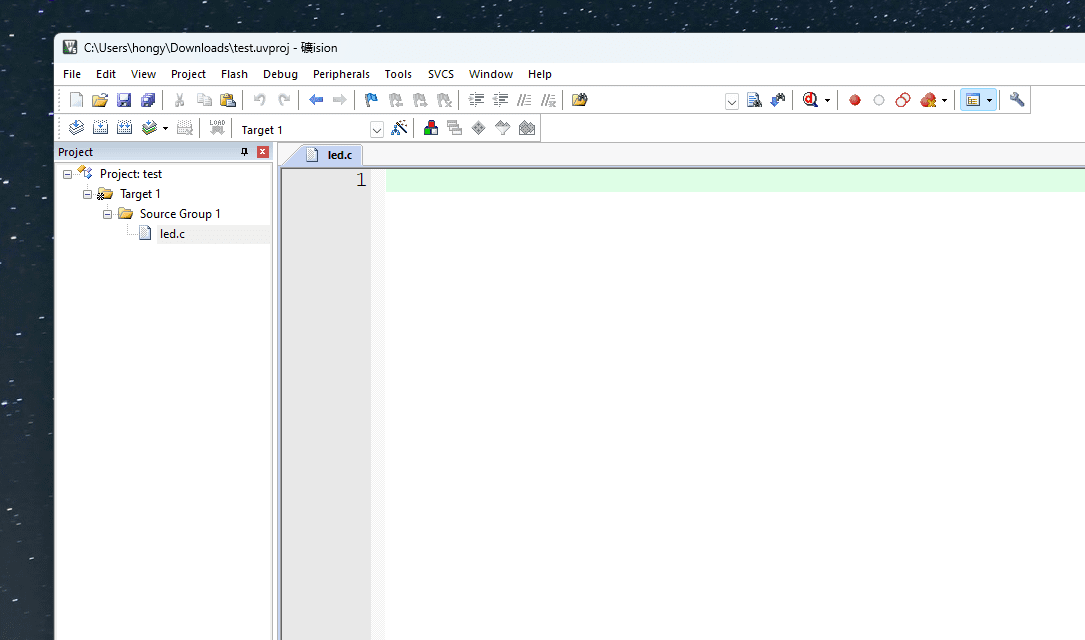
Now we are ready to write the code.
Writing Code
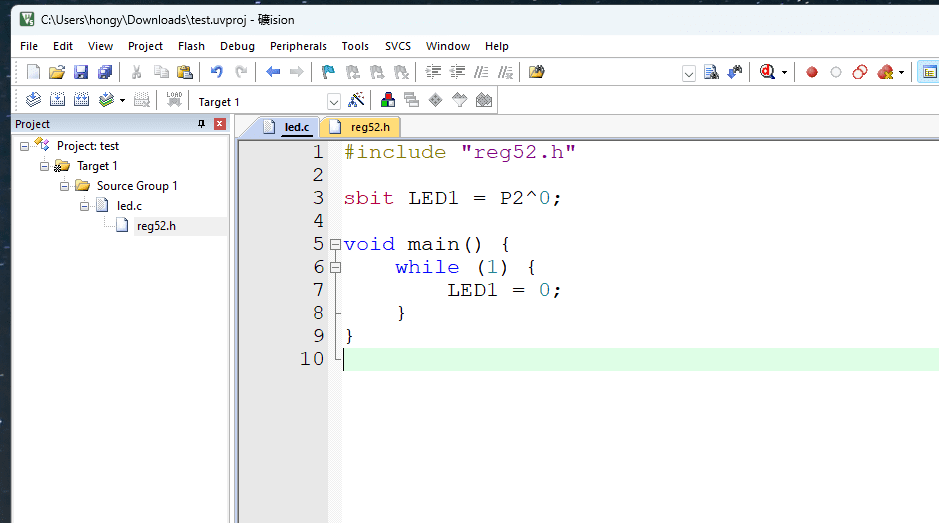
First, we need to include a header file called “reg52.h,” which names different pins on the microcontroller.
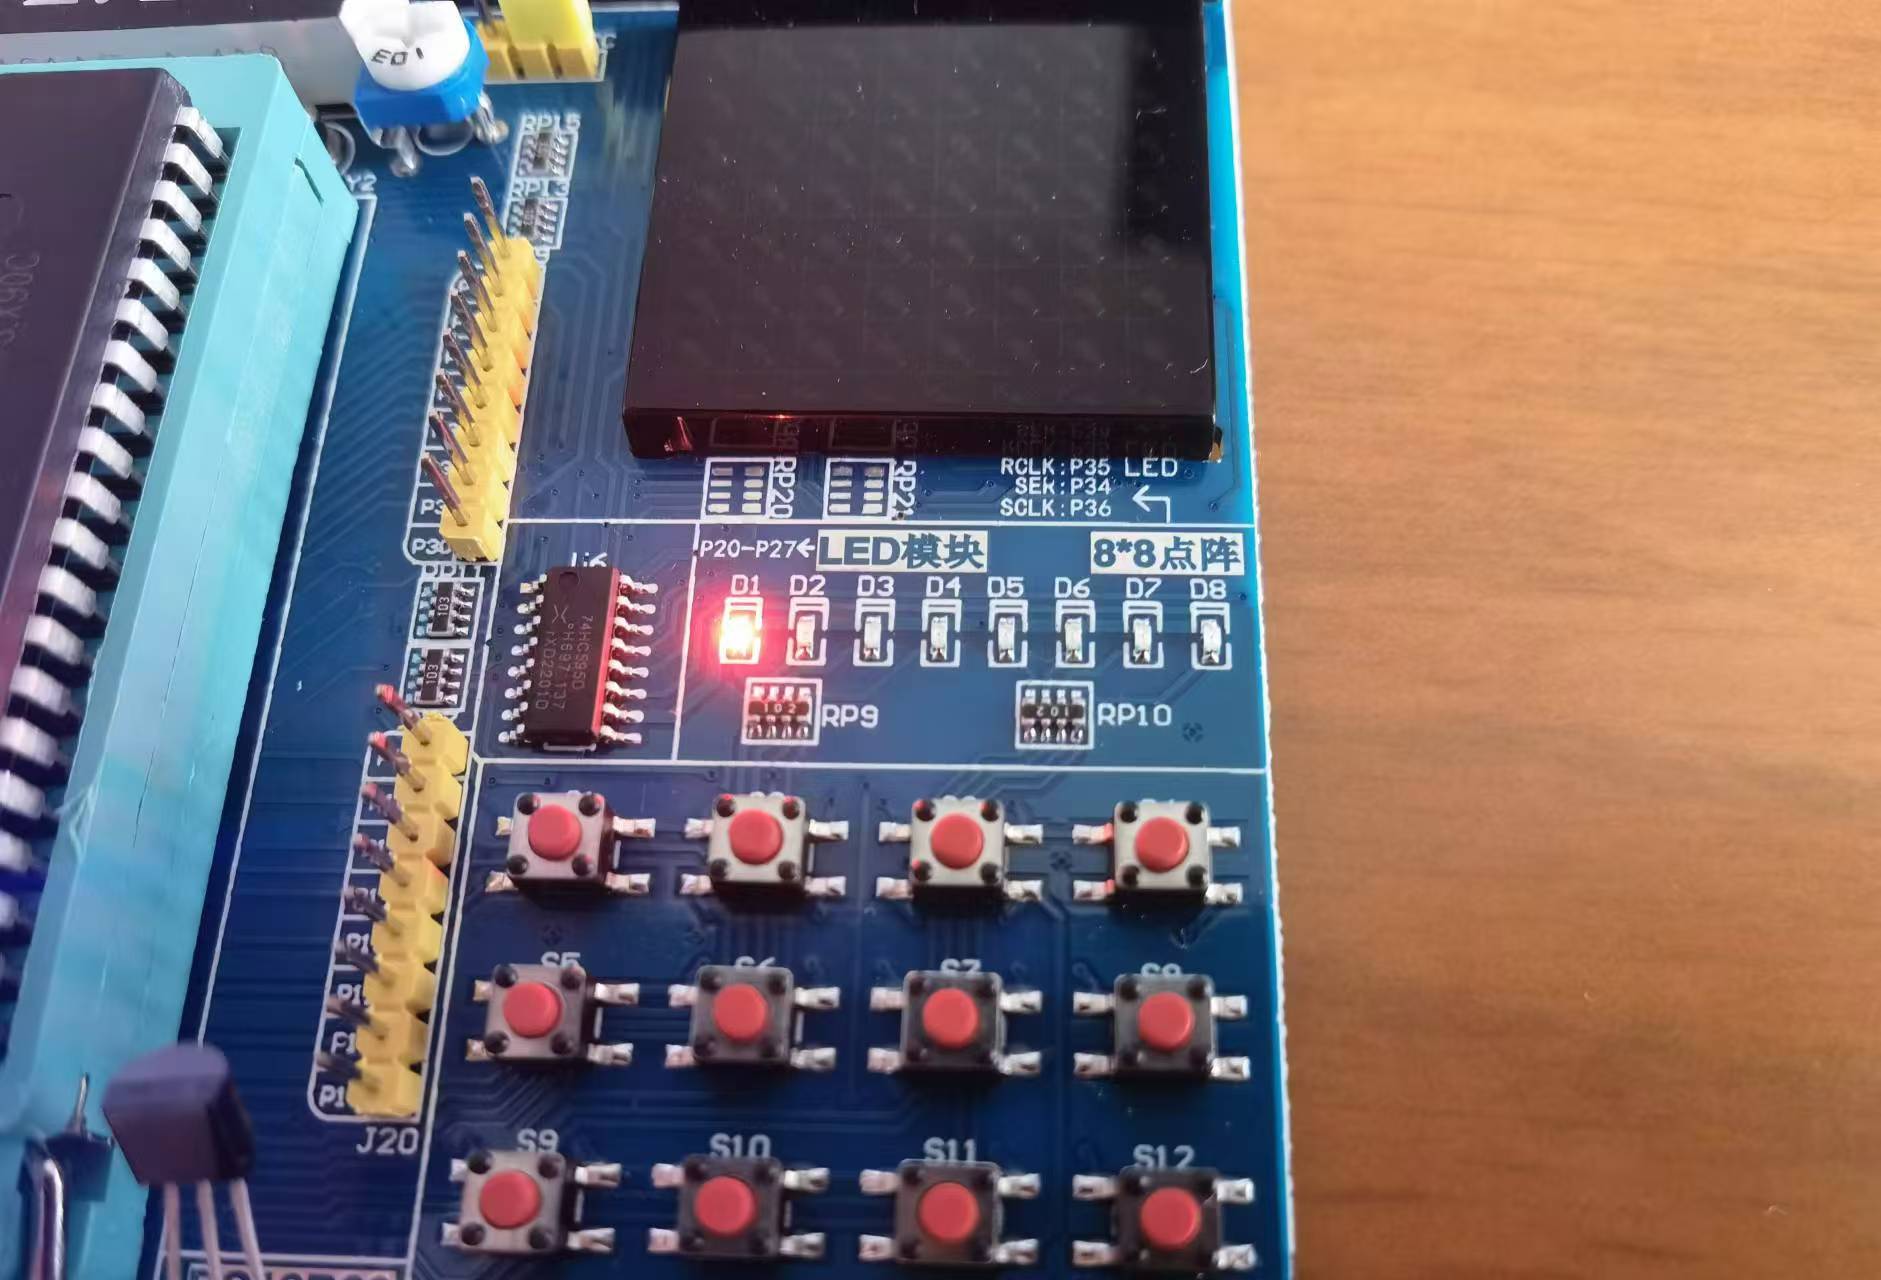
The first LED on my development board is connected to the P2.0 pin. According to the manual, setting the P2.0 pin to low will allow current to flow and light up the LED D1.
We then give the P2^0 pin a name, such as LED1. The name doesn’t matter.
Next, we write a main function, placing our task in an infinite while loop, and set the LED1 pin to 0 (low level).
Compiling Code
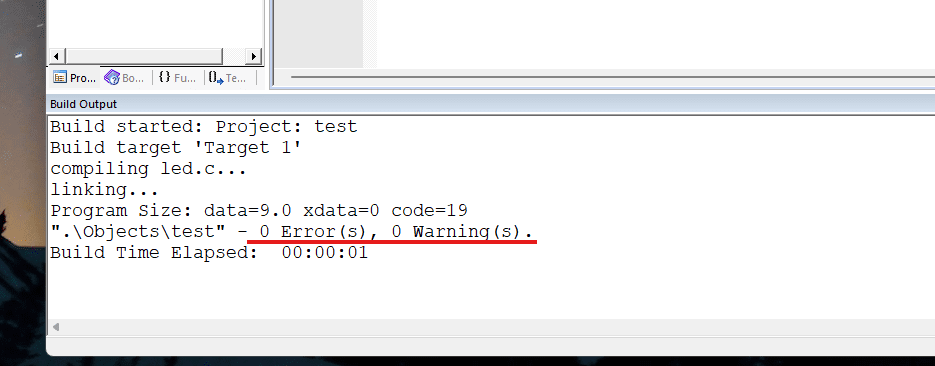
The code is written, but only humans can understand it. To make the machine understand, we need to compile it.
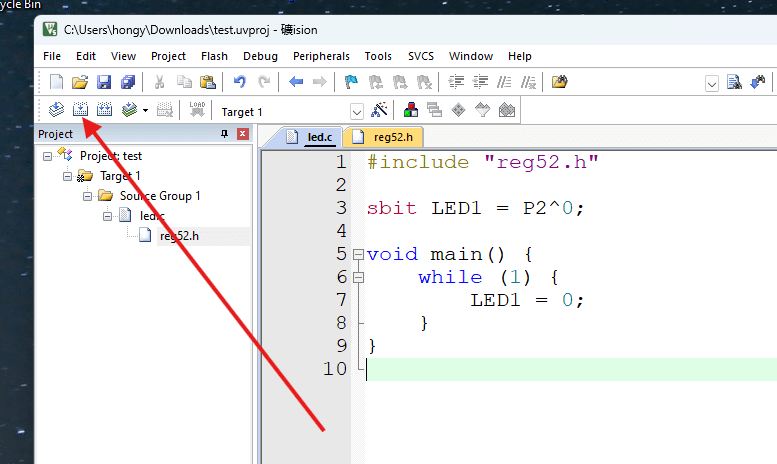
Click the compile button in the upper left corner.
Check the compilation output below; if there are no errors, the compilation is successful.
Burning the Compiled HEX File into the Microcontroller
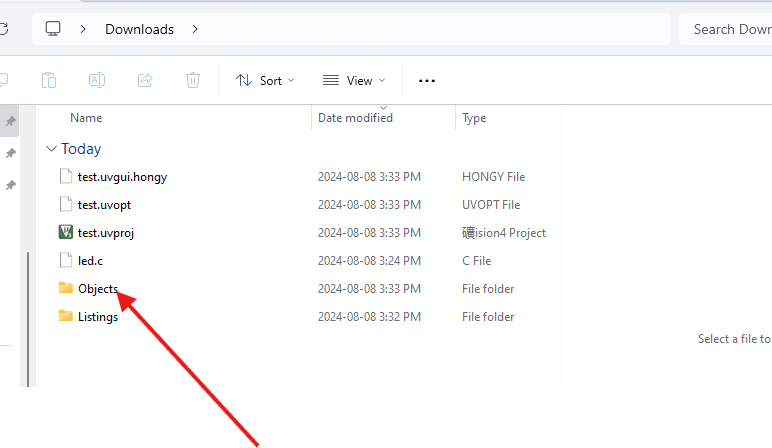
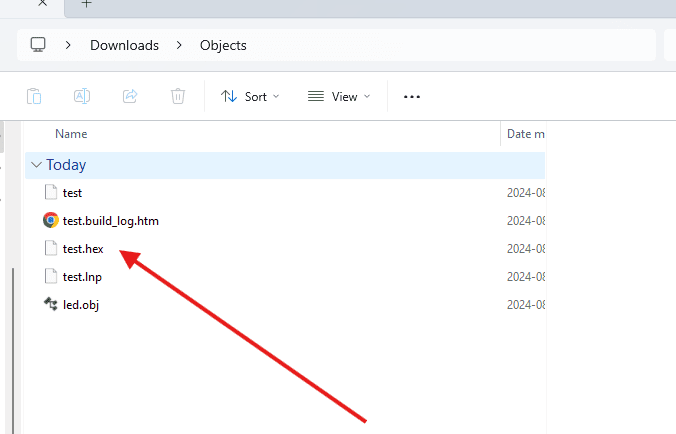
First, locate the project folder, open the Objects folder, and find the HEX file. This is the file we need.
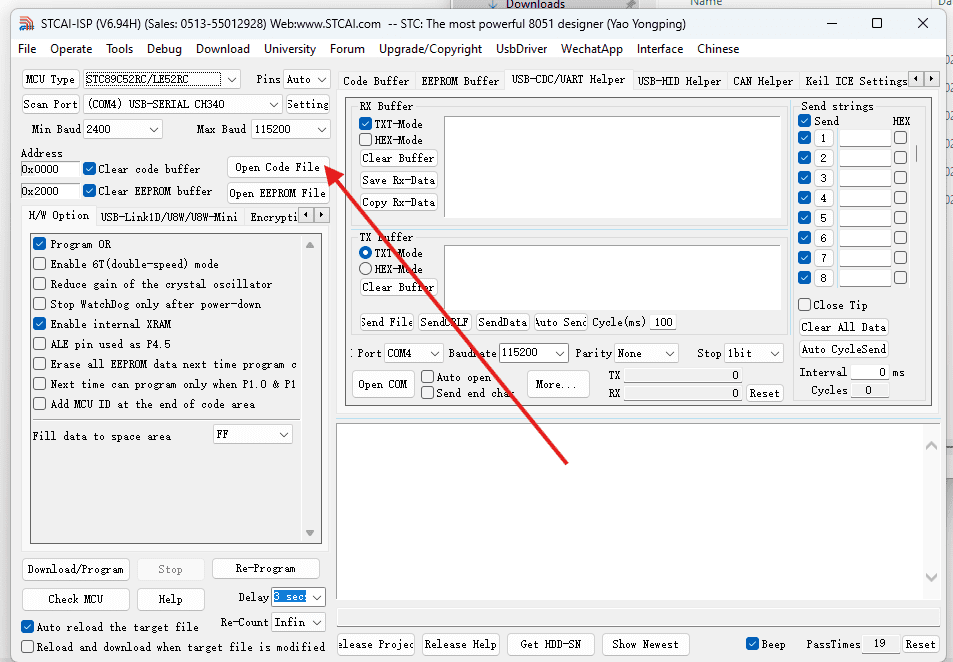
Then open the burning software.
Configuring the Burning Software (May Vary)
Connect the microcontroller to the computer.
This step is crucial; incorrect configuration will prevent burning.
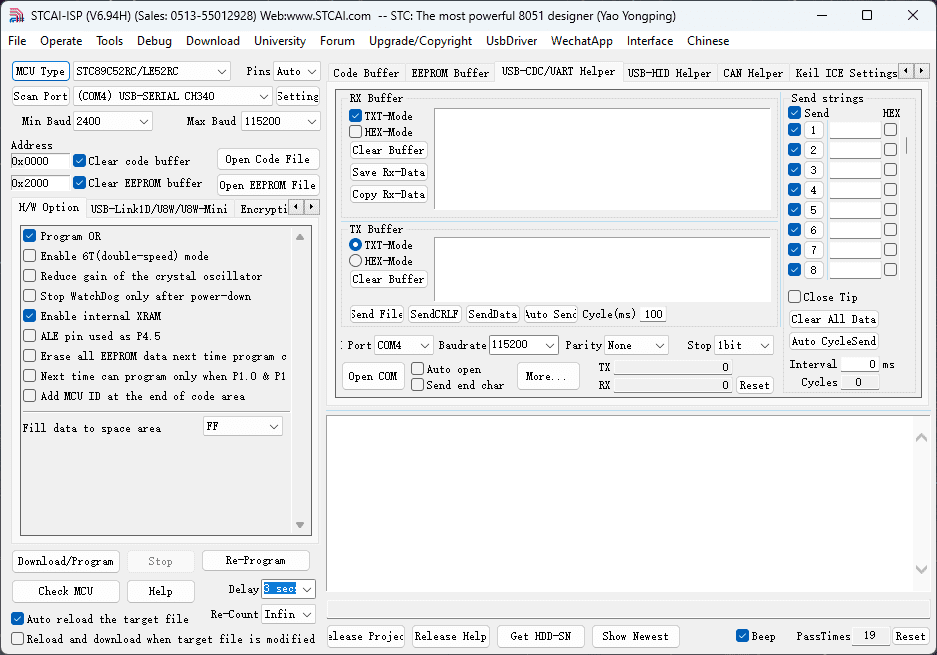
I use STCAI-ISP, and everything is based on this software.
First, select the microcontroller model. In this software, the model must be exactly the same. Your chip’s model must match the software selection.
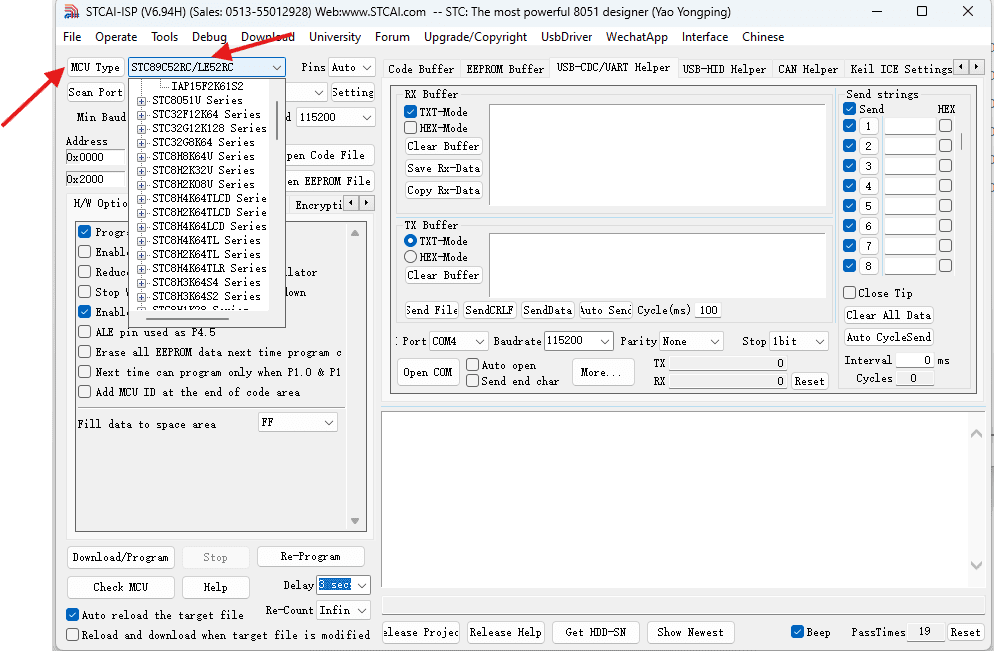
My chip model is 89C52RC, so I select this in the software.
Then choose our interface.
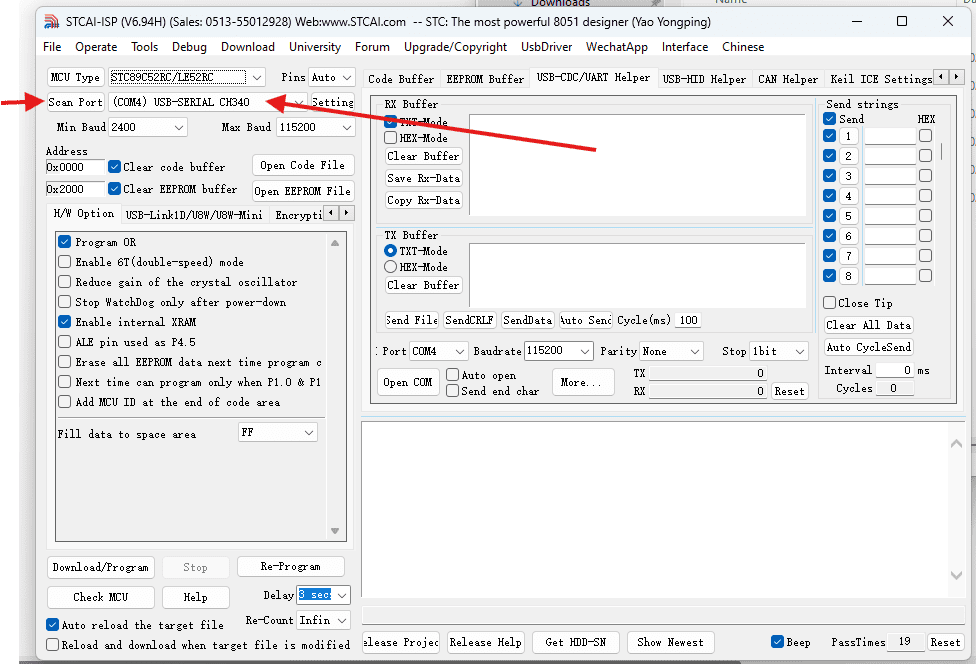
If your TTL chip doesn’t appear here, it may not automatically install drivers or is not driver-free. Install the driver first before burning.
No other settings need to be changed.
Burning
Turn off the microcontroller first.
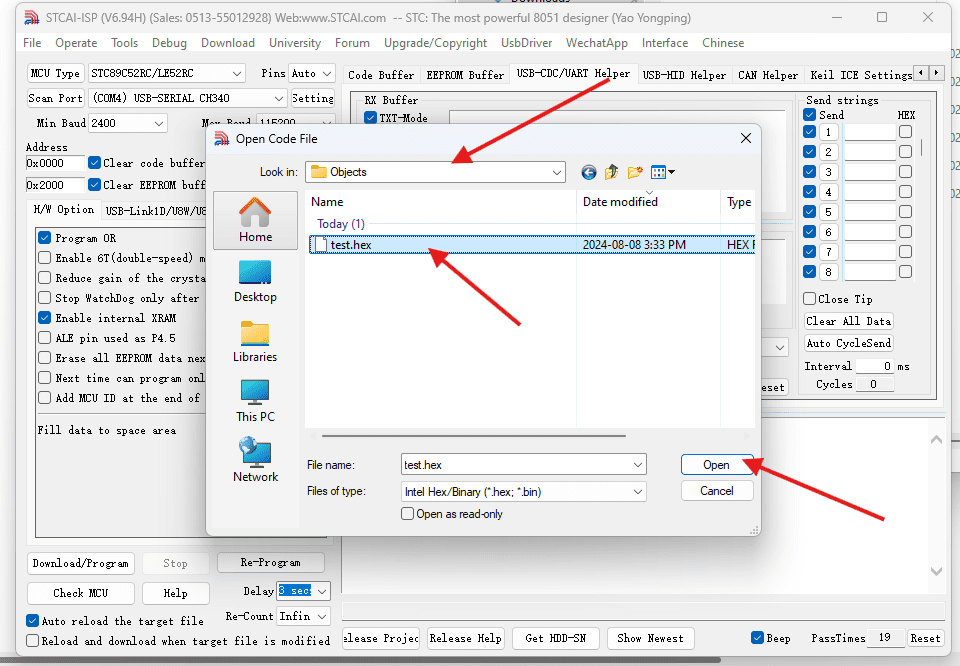
Then select the file to be burned.
In the pop-up window, find the project location, select the hex file, and click open.
Start burning by clicking the download program button in the lower left corner of the software.
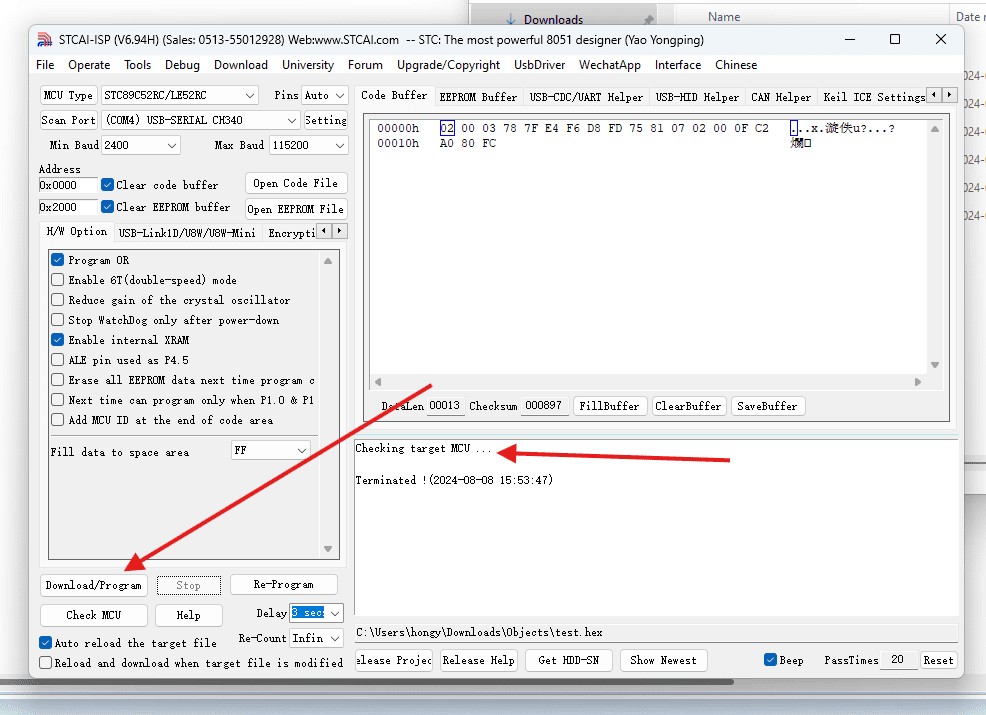
When the status shows “Checking target MCU…,” turn on the microcontroller.
The software will automatically burn the file into the microcontroller.
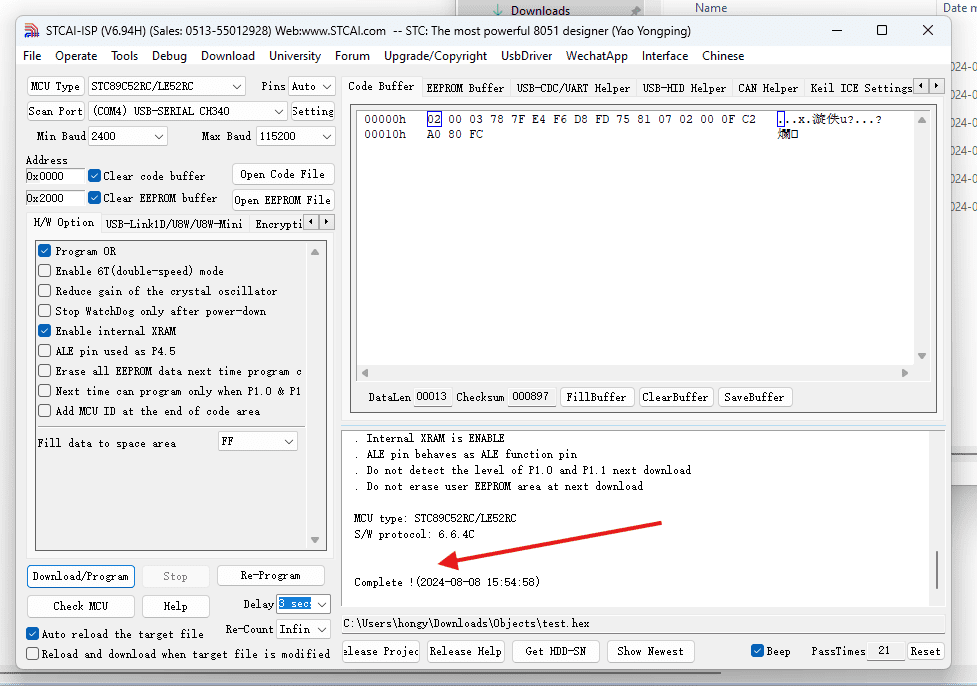
Now you can see the LED on the microcontroller is lit up.